§ How-To
How to Count Drive Links on a Chainsaw Chain
Measuring confusion: what are drive links, where to count, difference from cutters, must match bar exactly
Published · Last updated:
If you’ve ever tried to order a replacement chainsaw chain and gotten stuck on “drive link count,” you’re not alone. This question comes up often in owner forums, especially from homeowners trying to replace a worn chain on a battery or gas saw without hauling the whole setup to a dealer. The confusion usually comes from mixing up drive links with cutters, tie straps, or even bar length. The good news is that drive links are easy to identify once you know where to look, and getting that number right is critical because the replacement chain must match your bar exactly by bar length, pitch, gauge, and drive-link count.
What Drive Links Are and Why They Matter
Drive links are the small lower tabs on the chain that sit down inside the guide bar groove and engage the sprocket. They are not the sharp cutting teeth on top of the chain. When parts listings ask for “DL,” they mean the total number of those bottom tabs all the way around the loop.
This matters because two chains can share the same bar length, pitch, and gauge but still use a different number of drive links. That’s why “18-inch chain” by itself is not enough information to order correctly.
Here’s the quick breakdown:
- Bar length: the nominal size of the bar, like 14”, 16”, 18”, or 20”
- Pitch: the spacing of the chain’s rivets, such as 1/4”, .325”, 3/8”, or .404”
- Gauge: the thickness of the drive link that fits the bar groove, such as .043”, .050”, .058”, or .063”
- Drive-link count: the exact number of drive links in the chain loop
All four specs must match. If the drive-link count is wrong, the chain may be too long to tension properly or too short to install at all.
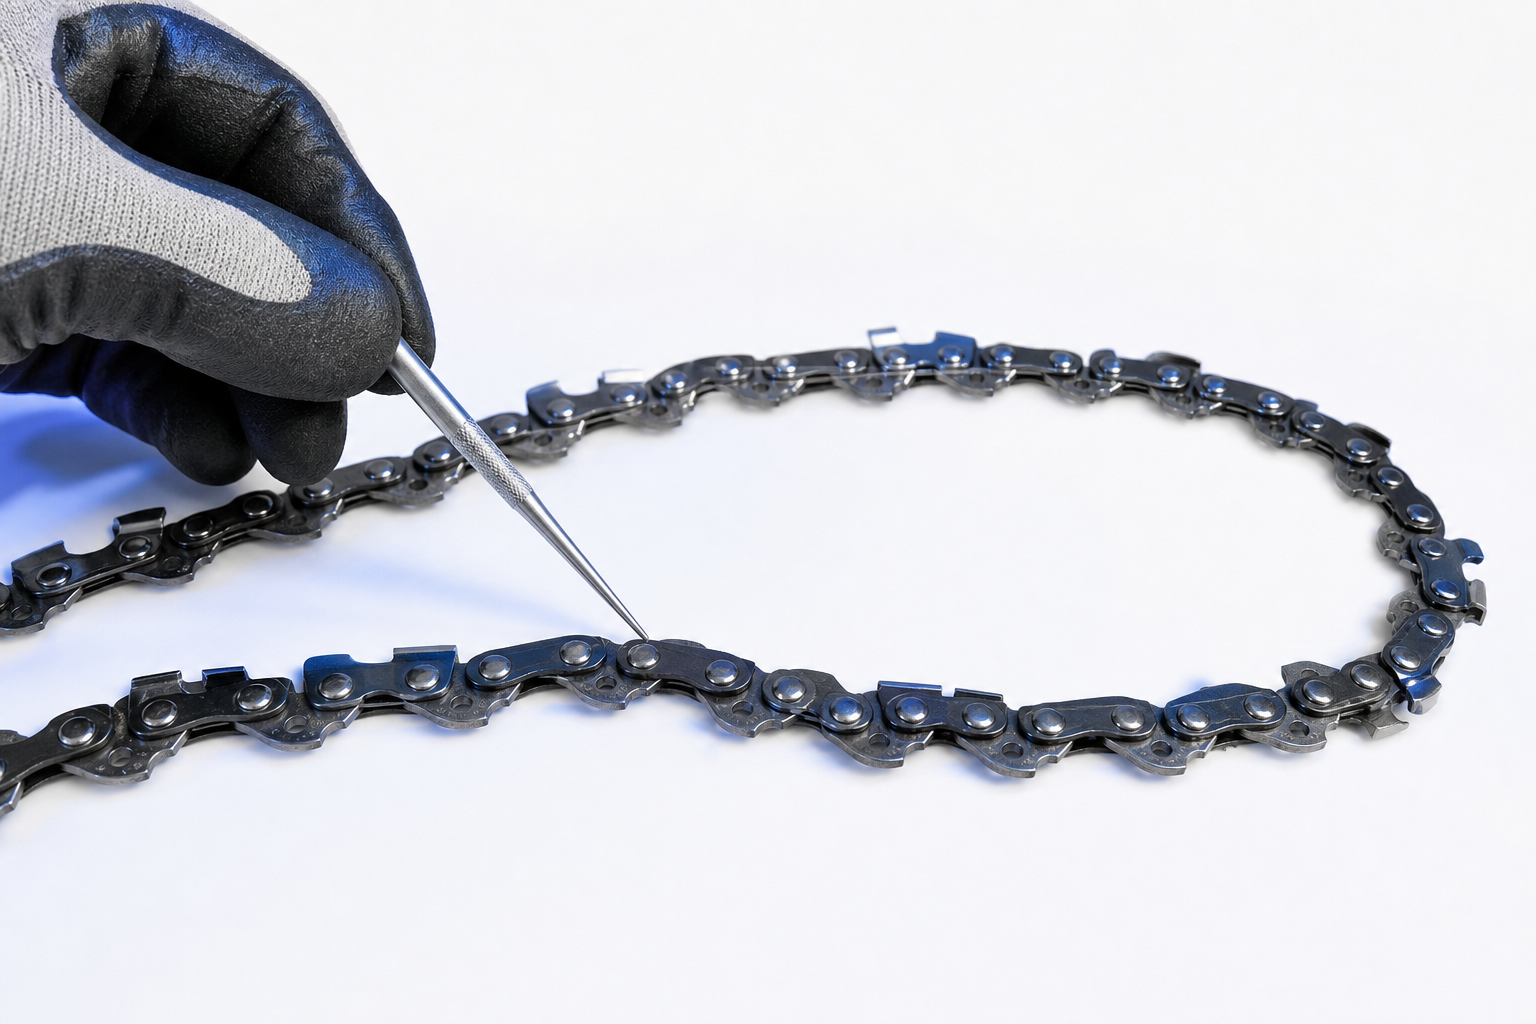
How to Identify a Drive Link on the Chain
The easiest way to spot a drive link is to look at the underside of the chain. Every drive link is the fin-like tab that points downward from the chain body. That tab rides in the bar groove.
On the top side of the chain, you’ll see:
- Left-hand and right-hand cutters
- Depth gauges in front of the cutters
- Tie straps connecting components
On the bottom side, you’ll see:
- The drive links
A lot of owners accidentally count the cutters instead. That gives the wrong total because the number of cutters is not the same as the number of drive links.
A simple way to avoid mistakes:
- Remove the chain from the saw if possible.
- Lay it flat on a bench or table.
- Turn part of the chain so you can clearly see the bottom tabs.
- Count only those tabs that drop into the bar groove.
If the chain is still on the saw, you can count drive links one by one while rotating the chain carefully by hand. Make sure the saw is off, unplugged, or the battery is removed. On gas saws, disconnect the spark plug wire if you want extra safety while handling the chain.
The Best Ways to Count Drive Links Accurately
There are a few reliable methods. Use whichever works best depending on whether the chain is removed, dirty, or badly worn.
Method 1: Mark and Count by Hand
This is the method I recommend most often.
- Clean the chain enough to see each drive link.
- Use a paint marker, chalk, or masking tape to mark one drive link as your starting point.
- Begin counting each drive link around the chain loop.
- Stop when you return to the marked link.
This prevents the classic mistake of losing your place and double-counting.
Method 2: Count in Groups
If the chain is long, count in sets of 10.
- Mark the starting drive link
- Count 10 drive links and make a small paper note
- Continue until you get back to the start
- Add the groups together
This works well on longer 20-inch and 24-inch loops where it’s easy to lose track.
Method 3: Check the Bar Stamp or Old Packaging
Many guide bars are stamped near the mounting end with chain specs, and some include drive-link count. Old chain boxes also often list all four chain specs. If the information is still legible and you know the bar and chain are original or correctly matched, this can save time.
That said, don’t assume the current chain is correct just because it fits loosely or came with a used saw. In owner forums, this is another common issue: a previous owner installed “close enough” parts. If there’s any doubt, count the drive links yourself and verify pitch and gauge too.
Common Counting Mistakes That Lead to the Wrong Chain
Most wrong-chain orders come from one of a few preventable errors.
Counting Cutters Instead of Drive Links
This is by far the most common problem. The cutters are the sharp teeth on top. The drive links are the tabs underneath. Parts sites need the drive-link count, not the cutter count.
Using Only Bar Length
A 16-inch bar does not always use one exact chain. Different saw brands and bar setups can use different pitches, gauges, and drive-link counts even at the same bar length.
Reading the Wrong Number on the Bar
Bars can have several markings stamped on them. Owners sometimes grab the model number or a code and assume it’s the drive-link count. Look specifically for chain specs, often shown together as pitch, gauge, and DL count.
Counting with the Chain Installed and Tensioned Wrong
A chain that is excessively loose or packed with debris is harder to count accurately. If possible, remove it and clean it first.
Assuming Battery and Gas Saw Chains Are Interchangeable by Length Alone
Homeowners often have both battery and gas chainsaws in the garage. Even if both use the same nominal bar length, the chain specs can differ. Exact-fit replacement chains must be matched by bar length, pitch, gauge, and drive-link count every time.
How to Confirm the Correct Replacement Chain Before Ordering
Once you’ve counted the drive links, take a minute to confirm the other specs so you only order once.
1. Verify Bar Length
Measure the usable cutting length of the guide bar from the front of the saw body to the bar tip, or use the labeled nominal bar size.
2. Confirm Pitch
Pitch is usually stamped on the bar or listed in the saw manual. If not, chain pitch can be measured, but most homeowners are better off using the bar stamp or manufacturer spec.
3. Confirm Gauge
Gauge must match the bar groove width. Common homeowner sizes are .043”, .050”, .058”, and .063”.
4. Confirm Drive-Link Count
Count the drive links directly from the chain loop.
5. Compare All Four Specs Together
Do not mix and match based on one or two specs. For an exact-fit replacement chain, the loop must match:
- Bar length
- Pitch
- Gauge
- Drive-link count
If your old chain is badly damaged or missing, the guide bar model number can often be used to identify the correct chain setup. That’s usually more reliable than guessing from saw brand alone, since bars are often replaced over the life of the saw.
Watch: Video Walkthrough
FAQ
Do I count both left and right cutters when figuring out drive links?
No. You do not count cutters at all for drive-link count. Count only the bottom tabs that ride in the guide bar groove.
Can two 18-inch chains have different drive-link counts?
Yes. That happens often. Two chains can both fit 18-inch bars but still differ in pitch, gauge, and drive-link count depending on the bar and saw setup.
What if the chain is too worn or broken to count accurately?
Use the guide bar stamp, owner’s manual, or bar model number to identify the correct chain specs. If the chain is intact enough, counting the drive links directly is still the best way to confirm the exact replacement.

Find the right part on Amazon
Check price, stock and fitment — ships direct from Amazon.
§ Parts